
As a user with administrator privileges, you will have access to the Site configuration menu item.
Clicking the Site configuration menu item will display the following window:

In the picture above it can be seen, that a second site has been added in addition to the auto-generated default site.
A site will typically represent a distinct business entity. Sites neither share master or transactional data with each other, i.e. a client connected to site A cannot see any data belonging to site B.
The site concept allows multiple distinct business entities to share the same ROB-EX infrastructure (databases, software services, client program, etc.) while still ensuring that each business entity lives isolated from each other.
When a ROB-EX client connects to the server, it must select what Site ID to connect to. A client can only be connected to one site at a time.
The same user can have different rights on different sites, i.e. a user can have an Admin role in site A and have a Viewer role in site B.
The Site configuration provides an overview of existing sites, as well as the possibility to add sites, edit sites and delete sites.
How to add or edit a site
To add a new site click the Add new site button and enter the information for the site.
| Name | Type | Description |
| Site id | Mandatory | A unique id for the site |
| Site name | Mandatory | A name for the site |
| Site Description | Optional | An optional description of the site |
| Enable event store | Optional | This is a 7.2 and later feature. Select the check mark to enable the Track Change by user feature. Note that changing this value currently requires a Multiuser Server service restart before the setting takes effect! |
To edit a site, simply click the site id. The site id of the site cannot be edited, so if the id must be changed, it is only possible by first removing the old site and then adding a new one.
Create a new local user
Press the link “Add new user” to create a new user. The following window is shown:
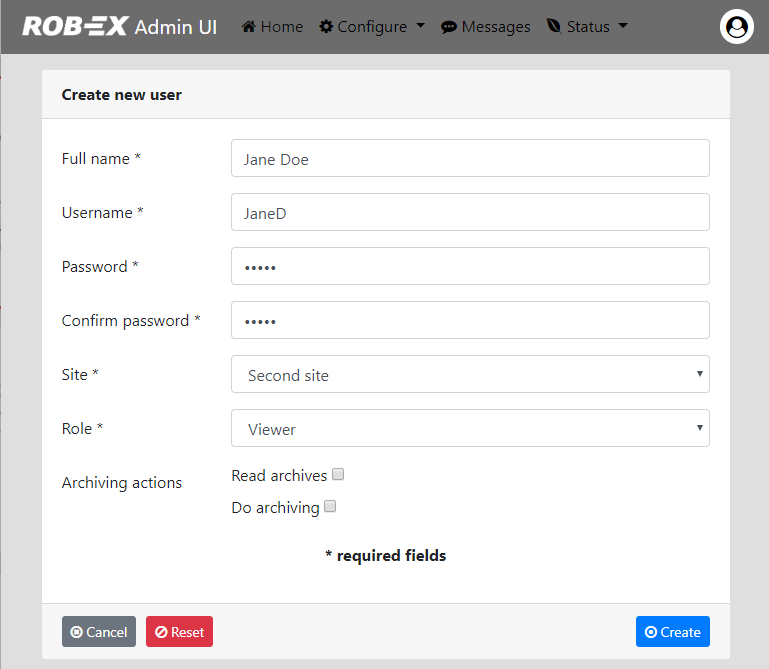
Enter
- The users full name,
- A username (e.g. initials) – this is the login name
- A password
Select
- If the user should be able to read archives
- If the user should be able to run archiving
- The role of the user.
- The site of the user (for information regarding sites, e.g. adding new sites, see section above “How to add or edit a site” )
When the correct information has been entered, press the Create button.
Adding a new user will automatically create a security rule for that user, providing access to the specified site. For further editing of the site access options for the user, see the section Security rule management.
Edit a local user
In order to edit a local user, click on the username link of the user in the “Manage users” window. The window Edit user is shown.
The following things can now be edited:
- The full name of the user
- The password of the user (e.g. initials)
Press the button Update in order to save the changes.
Post your comment on this topic.